
How to Choose and Use 48V COB LED Strip for Long-Run Installations
One of the biggest headaches in LED strip installation is voltage drop — the dimming of LEDs at the far end of a long run.
Standard 12V or 24V strips often require power injection every 5–10 meters. This adds complexity, cost, and potential failure points.
But what if you could run 30 meters with power at only one end — and no noticeable voltage drop?
That is exactly what a 48V COB LED strip can do.
In this guide, we will explain what 48V COB technology is, its key benefits, and how to use it correctly in your projects.
What Is 48V COB LED Strip?
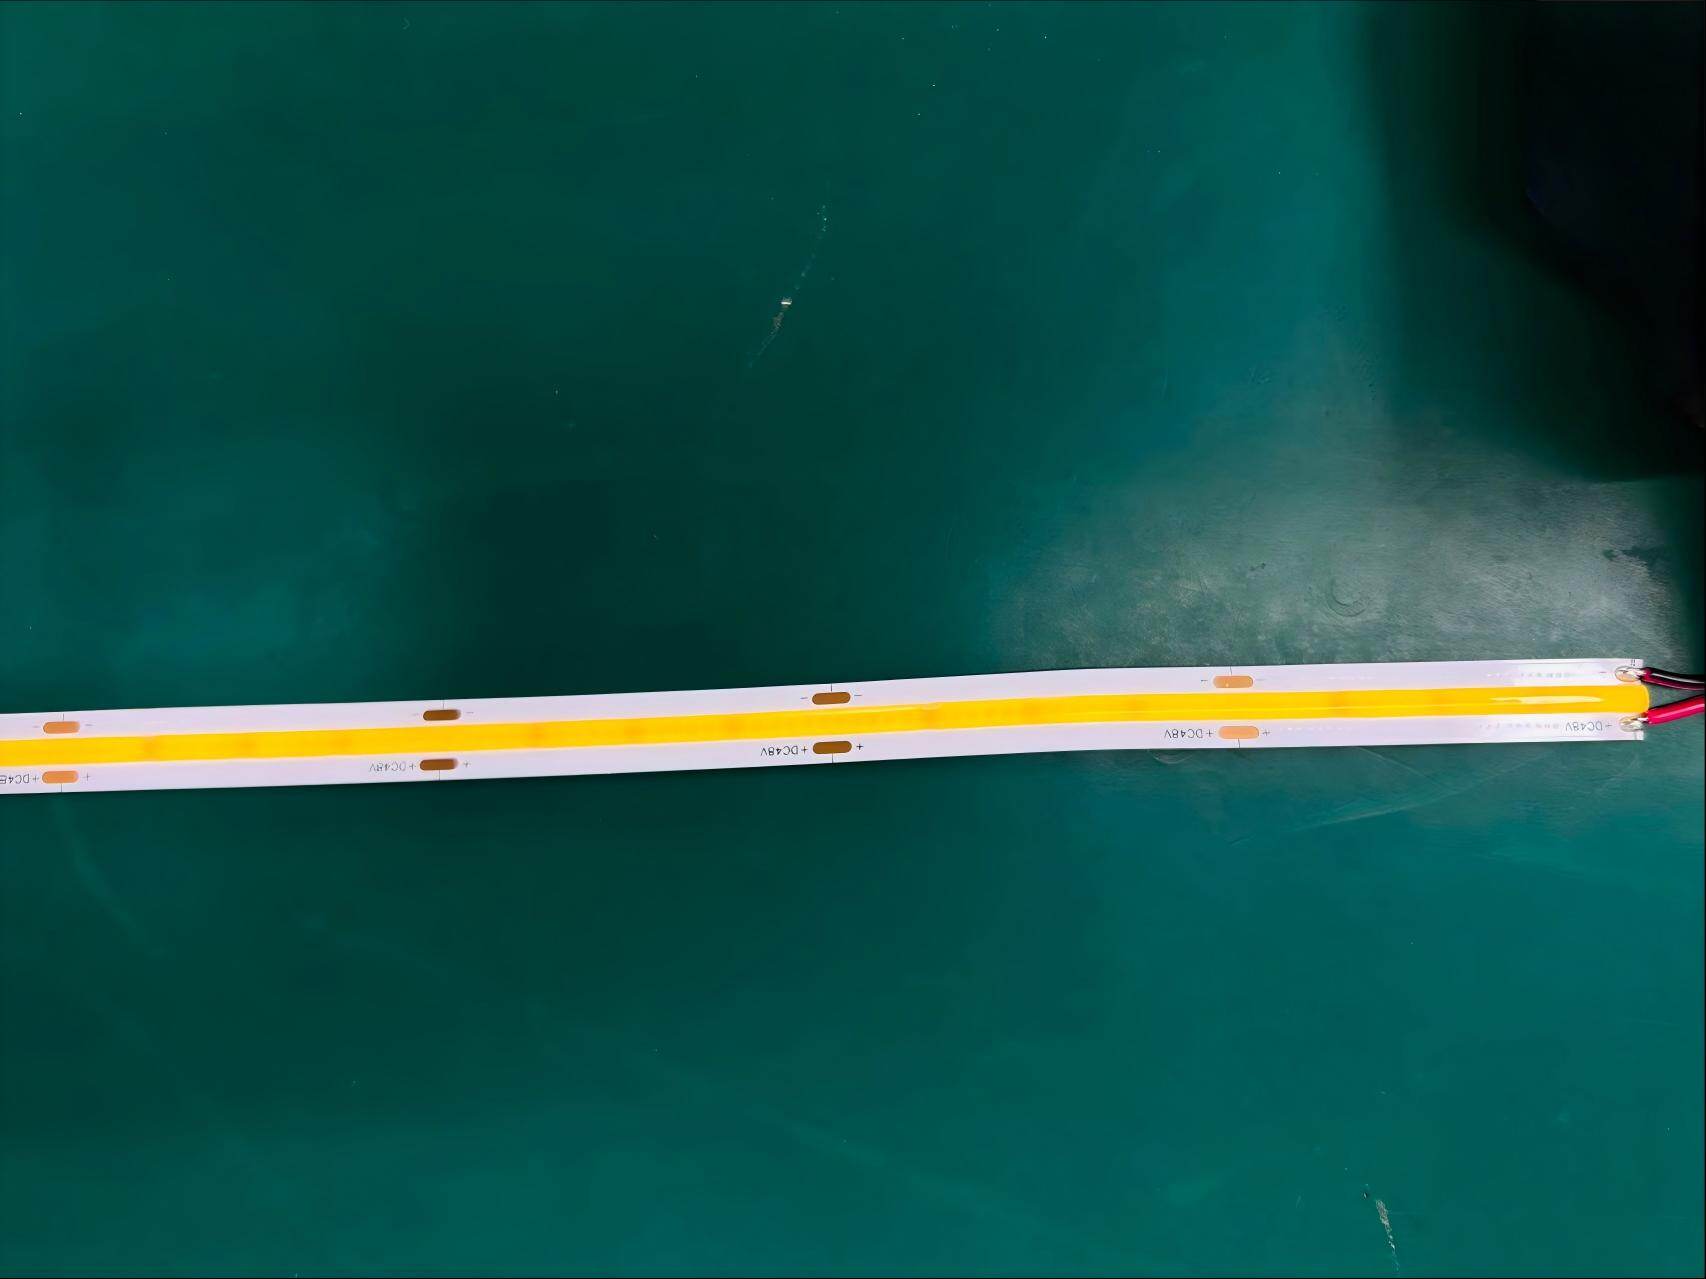
COB (Chip-on-Board) technology places LED chips directly onto the PCB in a continuous line, creating a seamless, dot-free light — unlike traditional SMD strips where individual LEDs are visible.
The 48V version takes this further. By operating at a higher voltage, it significantly reduces current, which in turn reduces voltage drop.
Feature | Specification |
|---|---|
Model | COB480-DC48V-10MM |
Voltage | DC48V |
LED density | 480 LEDs per meter |
Power | 10W per meter |
Lumen output | 900–1200 lm/m |
Efficiency | 90–120 lm/W |
CRI | ≥90 |
Beam angle | 180° |
Cutting length | 50mm |
Max connection length | 30 meters (one-end power supply) |
IP rating | IP20 (customizable to IP65/67/68) |
Key Advantage: No Voltage Drop Within 30 Meters
The standout feature of this 48V COB strip is its ability to run up to 30 meters with power supplied from only one end.

Why this matters: For a 30-meter installation, a 48V strip requires one power connection. A 12V strip would require 3–6 power injection points — more wiring, more labor, more failure risks.
This makes 48V COB strips ideal for:
Long corridor lighting
Retail shelf lines
Hotel cove lighting
Large display cases
Warehouse or industrial accent lighting
COB vs SMD: Why COB for Continuous Light?

If your project requires direct viewing of the strip (e.g., under a shelf, in a glass display case, or as a visible accent line), COB is the superior choice. The 180° beam angle and seamless light eliminate the "dotted line" effect of SMD strips.
How to Install 48V COB LED Strip Correctly
Step 1: Cut at the Right Point
The strip can be cut every 50mm at the marked scissor points. Always cut at these designated points to avoid damaging the circuit.
Step 2: Power Supply Sizing

Important: In actual use, it is recommended to consume 80% of the driver's rated power, keeping 20% as a safety margin for startup and stability.
Step 3: Connection Method
Clean the installation surface
Cut the strip to the required length at the nearest cutting mark
Peel off the double-sided adhesive tape and stick to the surface
Connect the strip's wires to the driver output port (positive to positive, negative to negative)
Turn on the power switch after confirming all connections are correct
Step 4: Waterproofing (If Needed)
The standard version is IP20 (indoor, dry locations only). For outdoor or damp environments, custom waterproofing is available:

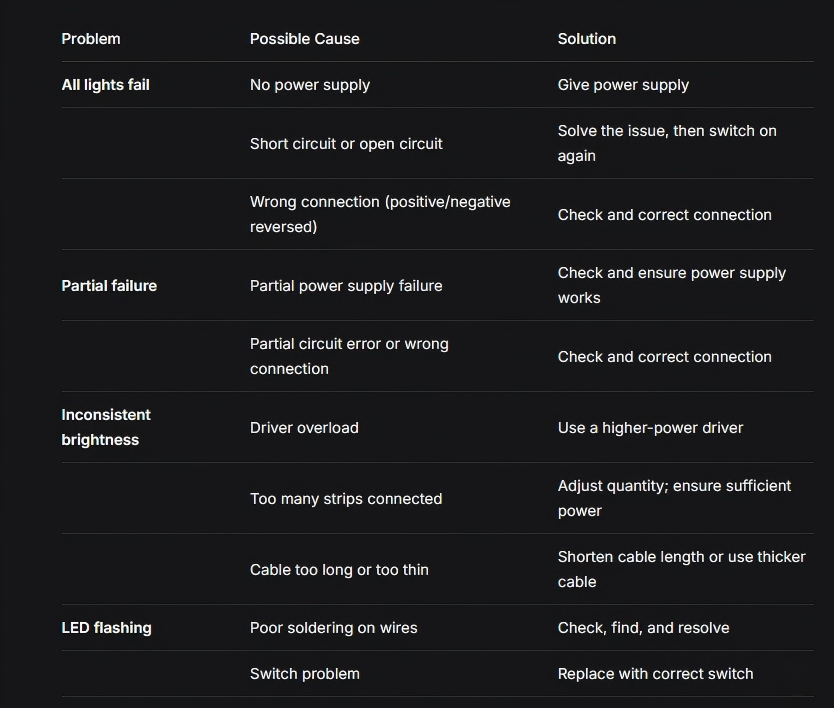
Troubleshooting Common Issues
Application Scenarios
This 48V COB strip is widely used in:

Summary: Is 48V COB Right for Your Project?

Final Thoughts
The 48V COB LED strip solves two common problems: voltage drop and visible LED dots. By operating at 48V, it allows for long, uninterrupted runs with minimal installation complexity.
If you are planning a project that requires long, continuous, high-quality light — without the headache of multiple power injections — this is a solution worth considering.
Have a Project in Mind?
We offer the COB480-DC48V-10MM strip in multiple color temperatures (2700K, 3000K, 4000K, 6000K) and custom waterproofing options.
👉 Contact Us Today to discuss your requirements or request a sample.